Getting Started with PIM for Outlook
Start with the side-panel layout, pin the add-in to the ribbon, connect your PIM login, and keep the app visible while you work.
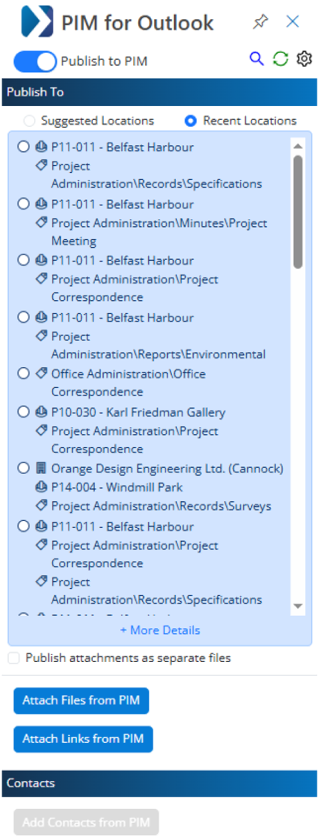
Screen layout basics
The PIM for Outlook interface uses a side panel on the right-hand side of the screen.
- Suggested Locations and Recent Locations guide where content should be published.
- More Details, Attach Files or Links, and Add Contacts from PIM extend the workflow when users need more control.
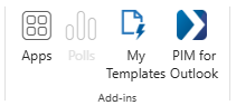
Launch PIM for Outlook
- Pin to the ribbon
- Launch from email pane
- On the Outlook ribbon, click
 .
. - In the list of available apps, right-click PIM for Outlook and choose Pin.
- This adds a shortcut alongside the other ribbon actions for faster access.
Classic ribbon

Simplified ribbon
In either New Outlook for Windows or Outlook Web App, you can also:
- Select an email in your inbox or folder.
- Click PIM for Outlook in the toolbar.
- The add-in opens in the side panel so you can work against the selected email immediately.
New Outlook supports both the classic ribbon and the simplified ribbon. The PIM for Outlook action can be pinned in either layout.
First-time setup
Connect your PIM login to Outlook
Before using the add-in, connect your PIM login to your Outlook account.
- In your PIM browser session, click the Microsoft Office icon to start the connection process.
- Select the Outlook account you want to connect.
- Complete identity verification if prompted.

Before connection

Connected successfully
Authenticate the app
Log in with your PIM credentials or trusted Windows credentials to connect the app to your environment.
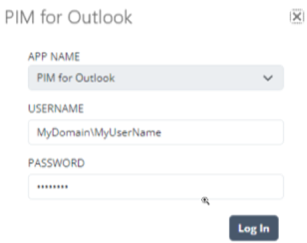
Standard PIM login
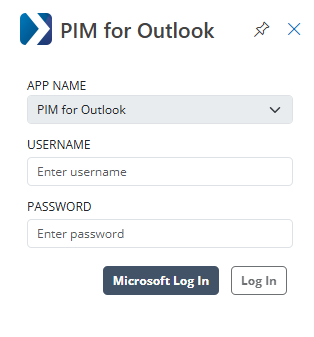
SSO-enabled login option
Keep the side panel visible
Pin the side panel so PIM for Outlook remains accessible while you compose or review messages.

Pinned view
Unpinned view
If your organization uses Single Sign-On for Deltek PIM, the Outlook account connection may happen automatically the first time the add-in opens.